
I had bought this vintage age roll top desk from Craigslist with the intention of giving it a few updates and reselling it. So, it's now for sale if you know someone in Northwest Ohio looking for a good solid desk. :)
The people that were selling it had cats (read there was cat hair all over it) and it was their daughter's desk. It was good and solid but dirty and not pretty. They lived in a very small house and were getting a piano for their daughter so the desk had to go to make room for the piano.
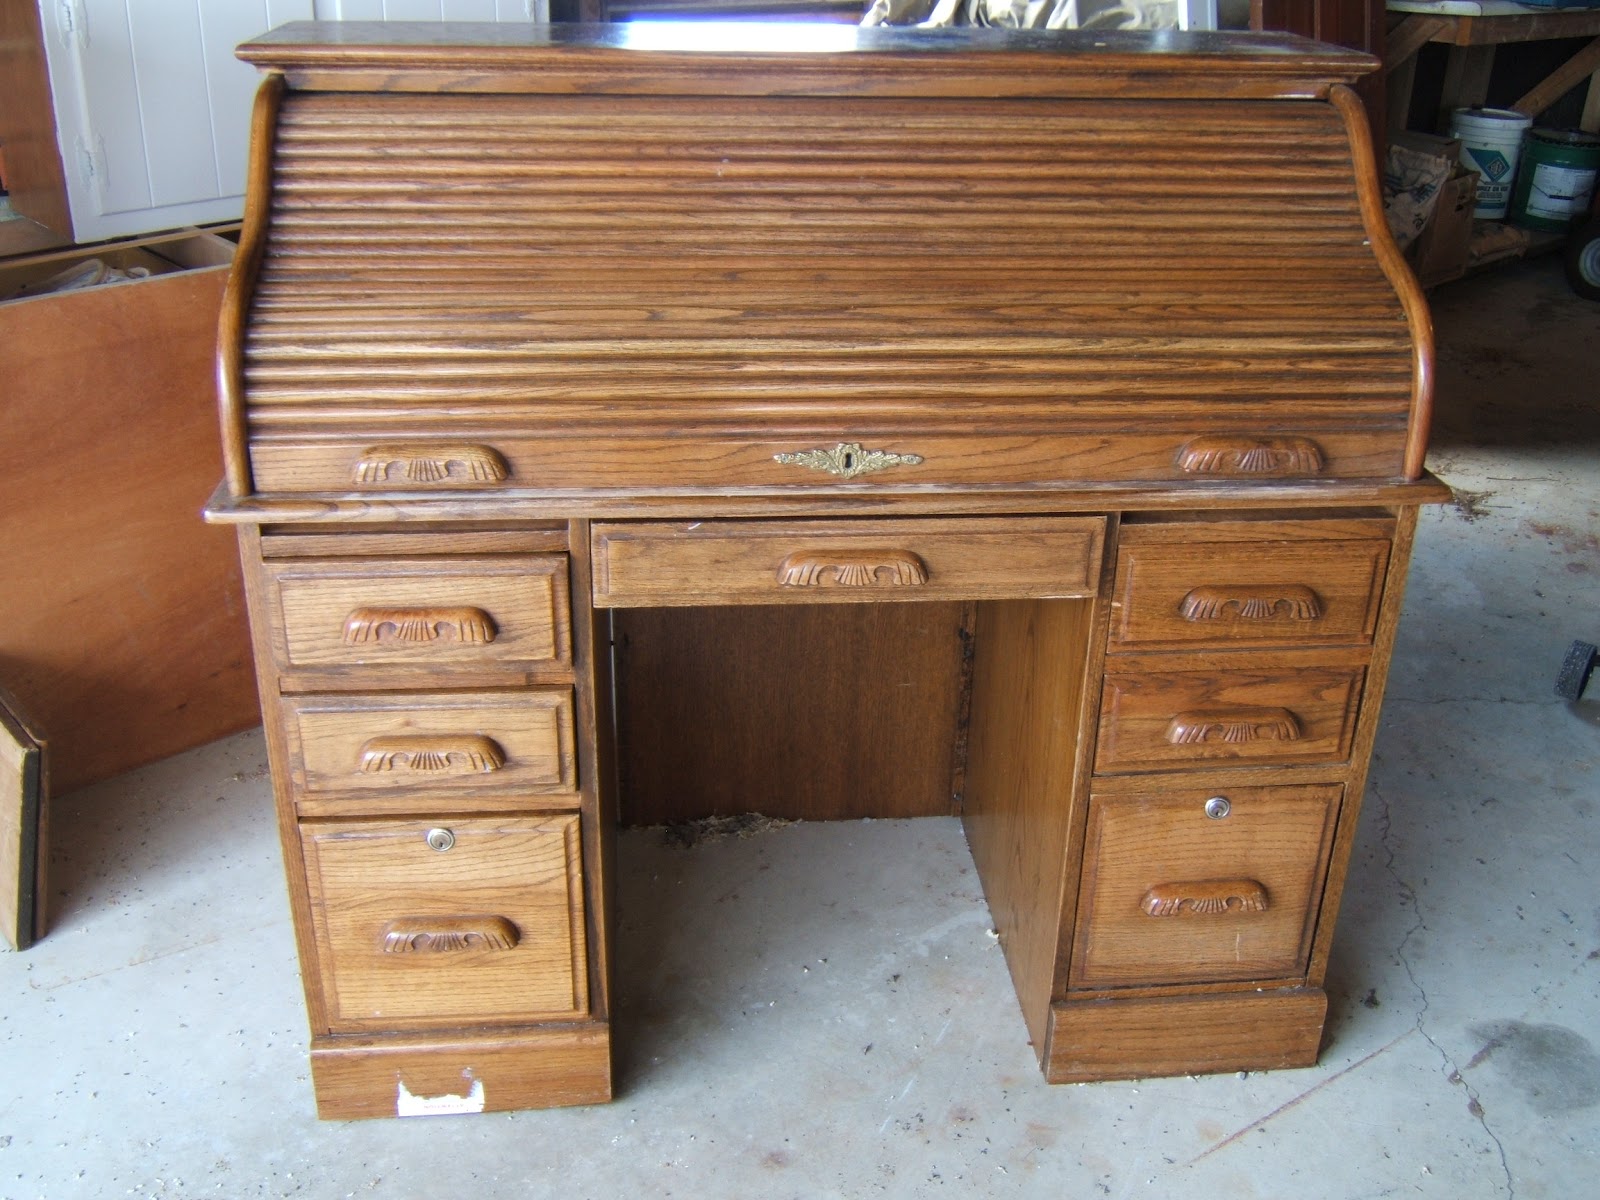
Here are some pictures of it "Before":

And here it is after I added some cute little bun feet, changed the drawer pulls, painted it with Annie Sloan chalk paint (old white), and waxed it. I think it's 100% improved.


You notice I didn't paint all the cubbies.... I was too lazy. :) I thought about just removing that part of it but there's just something I like about having it for organization. It was in good shape, unlike the top and the work surface.


So, I just left it as it was. And I think it looks ok this way.


In this picture you can see how I did the feet. First I added a board that was 1" larger than the bottom of the desk on 3 sides and screwed it down. Like this:
 |
| These two pictures are shown with the desk upside down. |
 |
| Sorry, this is a really poor shot but it's the only one I have like this. |
Then I put cove (I think that's what it's called) moulding around it on the ledge I created. For the feet, I just bought bun feet and mounting plates from Menards. Screw the plates to the bottom of the desk and then screw the feet into the mounting plate. I didn't take any progress shots (they're boring anyway). And because I like side by side comparisons here's the before and after again:

Linking to:
Between Naps on the Porch's Metamorphosis Monday
Coastal Charm's Nifty Thrifty Tuesday
My Uncommon Slice of Suburbia's Tuesday's Treasures
Savvy Southern Style's Wow Us Wednesday
DIY by Design's Winter Blues Wednesday
Chatty Chics' Wild Wednesday
Beneath My Heart's Best DIY Projects of February
Miss Mustard Seed's Furniture Feature Friday

Hi Rachel! Wow ~ what a gorgeous transformation! Your desk turned out with such character and style. I love the hardware and the feet you added. Well done!
ReplyDeleteSorry to hear your pound cake didn't turn out. I have made it many times without a problem. I really don't have any suggestions for you. It is dense as any pound cake is, but not chewy. Well, thank you for stopping by and leaving your comment.
Kindly, Lorraine
God, she turned a piece of furniture jewelry into one that can be found at Ikea...
DeleteOh, she's beautiful! Great job! What an amazing transformation! And I love that verse too. :)
ReplyDeleteMelody
ChattyChics.com
PS Please come show this off at my party on Wednesday if you can!
That's a beautiful transformation. It looks much happier now. Love the verse too.
ReplyDeletevery, very nice & i like the bun feet idea! Esther
ReplyDeleteThanks, Esther! :)
DeleteGreat job, Rachel! I had a big roll top desk like that {for over 25 years} that I would have liked to paint, but I think my hubby would have killed me. We wound up selling it before we moved anyway because we downsized and it wouldn't have fit in the new place. I sold ours to someone who came to look at something else I had listed on Craig's List {she bought both things}. And, we moved to Ohio from New York! I'm near Dayton though, but it's nice to meet another Ohio blogger! : )
ReplyDeleteVisiting from WUW! : )
Yay, another Ohio blogger! :) I'll have to pop over to your blog and check it out. Thanks for visiting.
DeleteOoooh...SO pretty! I love how it turned out! I think the inside still being in it's original wood adds some nice character to it. The only thing I was wondering is if it would be at all improved by painting the brass hardware black to match the other hardware? Either way, GREAT job!
ReplyDeleteYes, Stephanie, I think you're right. I'll have to take those pulls off and freshen them up. Unless it sells first. :)
DeleteI agree... the wood adds character. I hadn't thought about the drawer pulls but I agree with that too. :) Nice job, Rachel! Wow!!!
DeleteLove what you did with the desk-the feet and drawer pulls especially! I'm your newest linky follower-stop by for a visit!
ReplyDeleteYou did a beautiful job! Is a great piece now! Thanks for share it!
ReplyDeleteWow. amazing. I see these desks for sale all the time, but I didn't think they could look this good! Nice vision w/the feet and new hardware.
ReplyDeleteI'm considering undertaking a similar project on a larger version of your desk. I love your idea for the bun feet, and will probably use it. Can you tell me a little about what you went through to remove the original wood drawer pulls? Mine appear to be glued on, not screwed...were yours? I'm just wondering how much damage might be done to the drawer by trying to remove glued-on pulls...do I pry them off, or cut them...and just sand down and paint over any damage?
ReplyDeleteHi Janna! Regarding the wooden pulls; mine were just screwed from the back. If yours are glued, that could make it more difficult. I'm guessing that if you pry them off, the damage would be to the pull and not the drawer front. If it does damage the drawer front, you could use a wood filler/spackling type material to fill in the holes. (I like a product called Fast and Final.) Since you are painting it (I assume) you could just sand it after that and paint over it. Good luck with your project! I'd love to see pictures when you're finished. I welcome you to post them on my facebook page: https://www.facebook.com/TheOldeFarmhouseOnWindmillHill
DeleteOkay so not only is my name also Rachel, but I bought this exact same desk this weekend from someone on Craigslist. And I was thinking of painting it white... I was gonna do a contrast color inside the roll top but now that I've seen how lovely yours looks, I might just have to be lazy and leave the wood. Thanks for posting such great pictures/ instructions. I'm excited to get started now!
ReplyDeleteI just love how this turned out! I recently purchased a roll top desk very similar to this one and would love get this same look. Do you think the Annie Sloan chalk paint and wax hold up to daily use?
ReplyDeleteYes, the ASCP/ wax is a very durable finish. It takes awhile until it fully hardens (I think around 30 days) but once it's fully hardened, it's a great finish for daily use. The gal who bought this desk is using it for a reception desk in her hair salon so it gets lots of use. If you feel your's is becoming worn, just rub on another layer of wax. Hope this helps and I'd love to see how it turns out. You're welcome to share pics on my facebook page!
DeleteHere from Better After. Gotta say, this is one of my favorite ever Afters. (: I especially love the feet.
ReplyDeleteHi! I'm about to start refinishing a rolltop myself and only have one other project's worth of experience. Do you have any tips to share? I'm specifically worried about the paint on the roll top part (and the groove) preventing the top from closing and opening smoothly. Did you take all the pieces off and paint them individually or just paint the desk as a whole? Thanks!
ReplyDeleteHi Marie! I did take the top half of the desk off to paint. Mainly because I was painting it in my dining room and it made smaller pieces to work around. :) I can't think of any specific tips. For the groove where the roll top slides, I didn't paint exceptionally thick because I wanted to be sure it would still slide up and down. I'm thinking it may wear off there first over time but if you don't open and close the lid often, that wouldn't be an issue. The 'slats' of the roll top themselves painted nicely and the lid still worked smoothly after painting.
DeleteI'm not sure I've been much help but I will be happy to answer specific questions you have. Good luck with your project! You're brave to tackle a big job like this for your second piece. :)
I don't know if you will see this or how active you are on posts but I hope you see this. I am a reporter with the Arkansas Democrat-Gazette and I used this as inspiration to create a DIY story and redo my old roll top desk. There is one downfall, I lost my before photo after my husband wiped our laptop. Would you be willing to let me use the photo of your before picture? We mentioned your blog in my favorite DIY blogs that will go along with the story. My email is tparker@arkansasonline.com if you could send a higher resolution photo.
ReplyDelete-Tina Parker
Beautiful job!
ReplyDeleteYou've inspired me to paint my rolltop. Question...can you give me a more detailed list of the steps you did for the painting? I'm new to ASCP, and need as much help as I can get!
Thank you!
Beautiful job!
ReplyDeleteYou've inspired me to paint my rolltop. Question...can you give me a more detailed list of the steps you did for the painting? I'm new to ASCP, and need as much help as I can get!
Thank you!
I second Alice's request - can you please provide a more detailed step by step on the ASCP paint and the wax. I'm tackling a huge roll-top as my first ever project!
ReplyDeletep.s. and yours is STUNNING! Thanks for the inspiration.
Came across this from a Google search. Beautiful job! I've been eying secretary desks on Craigslist to paint and I love that you left the inside wood. I think it looks beautiful and I love the contrast from the Old White. I too am a huge fan of ASCP.
ReplyDeleteHi Rachel, I have a roll top desk exactly like the one you remodeled! Except my desk is missing the bottom left drawer. Do you know how I can get that replaced?
ReplyDeleteDo you still have the wood drawer handles? I might be interested in those if you do. Please let me know.
ReplyDeleteI have one identical that I need the slide rails for one of the big bottom drawers. Please help me if you know where or what company to contact. Please email me at big44judge@yahoo.com
ReplyDeleteDo you have any idea what brand/ maker of this desk? I have one just like it and have lost the key and had locked it, I searched the internet for pics to find out what company I can contact?
ReplyDelete